Van Nuys has a lot of older homes. Some were built in the 1940s and 1950s, others even earlier, and many of them still carry the original trim work that made them stand out. Crown moulding with deep profiles, wide baseboards, picture rails, and detailed casing around doors and windows were standard in a certain era of home construction. When homeowners start renovating these properties today, one of the first things they notice is that the old moulding is either damaged, missing, or impossible to find at a regular supply store.
That is where custom millwork comes in.
Why Historic Moulding Is So Hard to Match Off the Shelf
Most moulding sold at big-box retailers today comes in a limited range of profiles. Colonial, ranch, and a few contemporary options are about what you will find. But older homes were built with moulding that had specific curves, depths, and proportions that do not match anything currently in production. A craftsman bungalow from the 1920s had a completely different trim style than a mid-century ranch from the 1950s, and neither of them looks right with the flat, shallow profiles sitting on store shelves today.
When you are trying to repair a section of damaged moulding in a historic home, bringing in a new piece that does not match the existing profile creates a visual break that is hard to ignore. Even when painted over, the difference in shadow lines and depth will show. The only real fix is to have the profile replicated.
What Makes a Profile Difficult to Reproduce
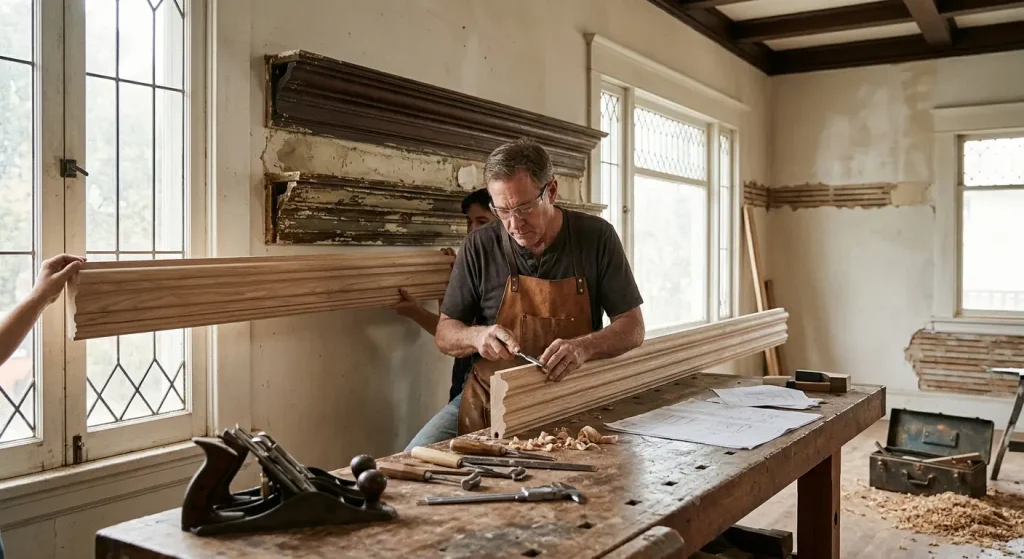
The challenge with older moulding profiles is that many of them were designed for a different production era. They were milled on different equipment with knife sets that no longer exist. Some profiles combine multiple curved elements — an ogee, a cove, and a flat section, for example — in proportions that do not correspond to any modern standard. Getting those proportions right requires studying the original piece carefully and cutting a custom knife to match.
A sample of the existing moulding is always the starting point. From there, a milling facility can measure the profile and produce a matching run in the species and material the project calls for.
The Process of Getting Custom Moulding Made
It starts with pulling a clean sample from the existing trim. The longer and cleaner the sample, the better, because the milling team needs a full read of the profile across its entire width. If the original piece is painted, some of that paint may need to come off to get accurate measurements on the depth and curvature.
Once the profile is documented, the milling setup begins. A custom knife is created to match the original. From there, the moulding can be run in whatever species the project calls for. If the existing trim is oak, the new run will be oak. If it is poplar painted white, that works just as well. Finger-jointed material is a solid choice for painted applications because it holds paint well and stays stable over time.
Species Selection for Historic Replications
The species matters more than people sometimes think. Not every wood mills the same way, and some profiles show more detail in certain species than others. Hardwoods like oak and poplar hold a sharp edge on milled profiles. Softer woods can round over slightly on the detail, which changes the finished look.
For painted applications, poplar and finger-jointed pine are both good choices. They accept primer and paint well and stay dimensionally stable in interior environments. For stained applications, oak is the most common choice in older Southern California homes, though maple and cherry show up in higher-end historic properties.
Getting the Right Fit in Older Walls
One thing that makes historic moulding projects tricky is that older walls are not always flat or plumb. Plaster walls from the pre-drywall era can have surface variations that modern drywall does not, and that means the new moulding has to be installed with some flexibility. Flexible moulding products help in areas where wall irregularities are a factor, though for most straight runs, solid milled material works well.
The coping and miter cuts also need to account for corners that may not be true 90-degree angles. An experienced installer who has worked in older homes knows to measure and scribe carefully rather than assume the corners are square.
Keeping Consistency Across a Full Room
One common mistake in historic moulding projects is replacing only the damaged section and leaving the rest. This can work if the match is very close, but it is usually better to run new moulding across the full wall or room when possible. That way, any minor variation in the new run is not sitting directly next to the old material, which tends to make the difference more visible.
When the goal is a full room restoration, the new moulding should be primed and painted to match the existing finish. A good painter can work the new and old sections together so the break disappears.
What to Bring When You Come In
If you are working on a historic home in Van Nuys or anywhere else in the San Fernando Valley and need to replicate existing trim, bring a sample of the moulding you need to match. A section of at least 12 inches gives enough material to read the full profile. Bring photos of the room as well — the context helps when discussing species options and finish direction.
Custom millwork takes time, so planning ahead makes a real difference. Most custom runs require lead time, particularly when a new knife set has to be created. Getting started early in the project timeline means the moulding is ready when the installation crew needs it.