
Door casing that fits
your home perfectly.
Colonial, Craftsman, modern flat, Victorian, farmhouse – every door casing style explained alongside materials, sizing rules, installation steps, and how to match casing to your existing hardwood floors. Expert guidance from 50 years of Southern California millwork.
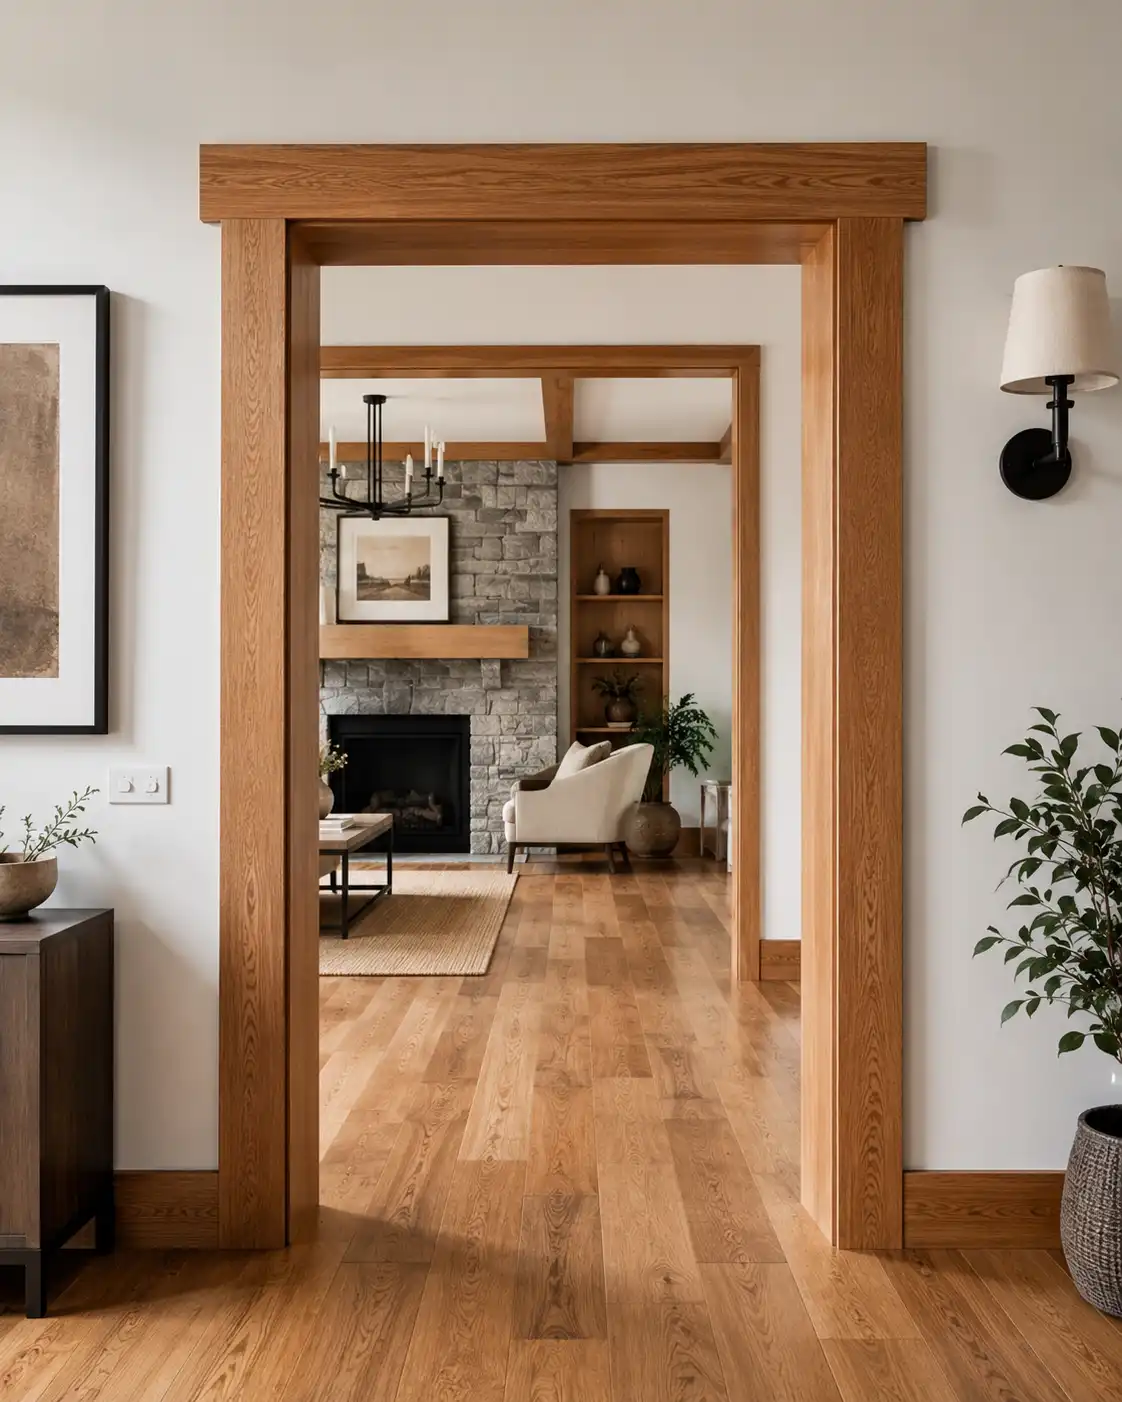
What is door casing?
Door casing is the decorative trim moulding that frames a door opening on both sides and across the top, covering the gap between the door frame and the adjacent wall surface. It serves two purposes simultaneously: a practical one of sealing the rough opening where the door frame meets the drywall, and a decorative one of adding architectural character to every doorway in the home.
A standard door casing installation consists of three pieces: two side pieces called leg casings that run vertically along each side of the door opening, and one horizontal piece called the head casing that spans the top. The three pieces join at the upper corners using either a mitered joint cut at 45 degrees or a butted joint with a separate corner detail.
Door casing vs door trim vs door frame: These terms are frequently confused. The door frame is the structural element built into the wall opening that holds the door. Door casing and door trim are interchangeable terms for the decorative moulding applied on top of the wall surface around the door frame. Casing and trim cover the jamb edge and the gap between frame and drywall.
At National Hardwood Flooring and Moulding, we supply door casing in multiple hardwood species, paint-grade wood, and custom-milled profiles from our Van Nuys showroom. We also mill custom casing to match existing profiles in older homes where standard profiles are no longer manufactured. Visit our hardwood moulding page for current stock.
7 door casing styles: which one fits your home?
Door casing style refers to the profile shape and configuration of the moulding. This is the most important aesthetic decision because the wrong style clashes with your home’s architecture regardless of how well it is installed.
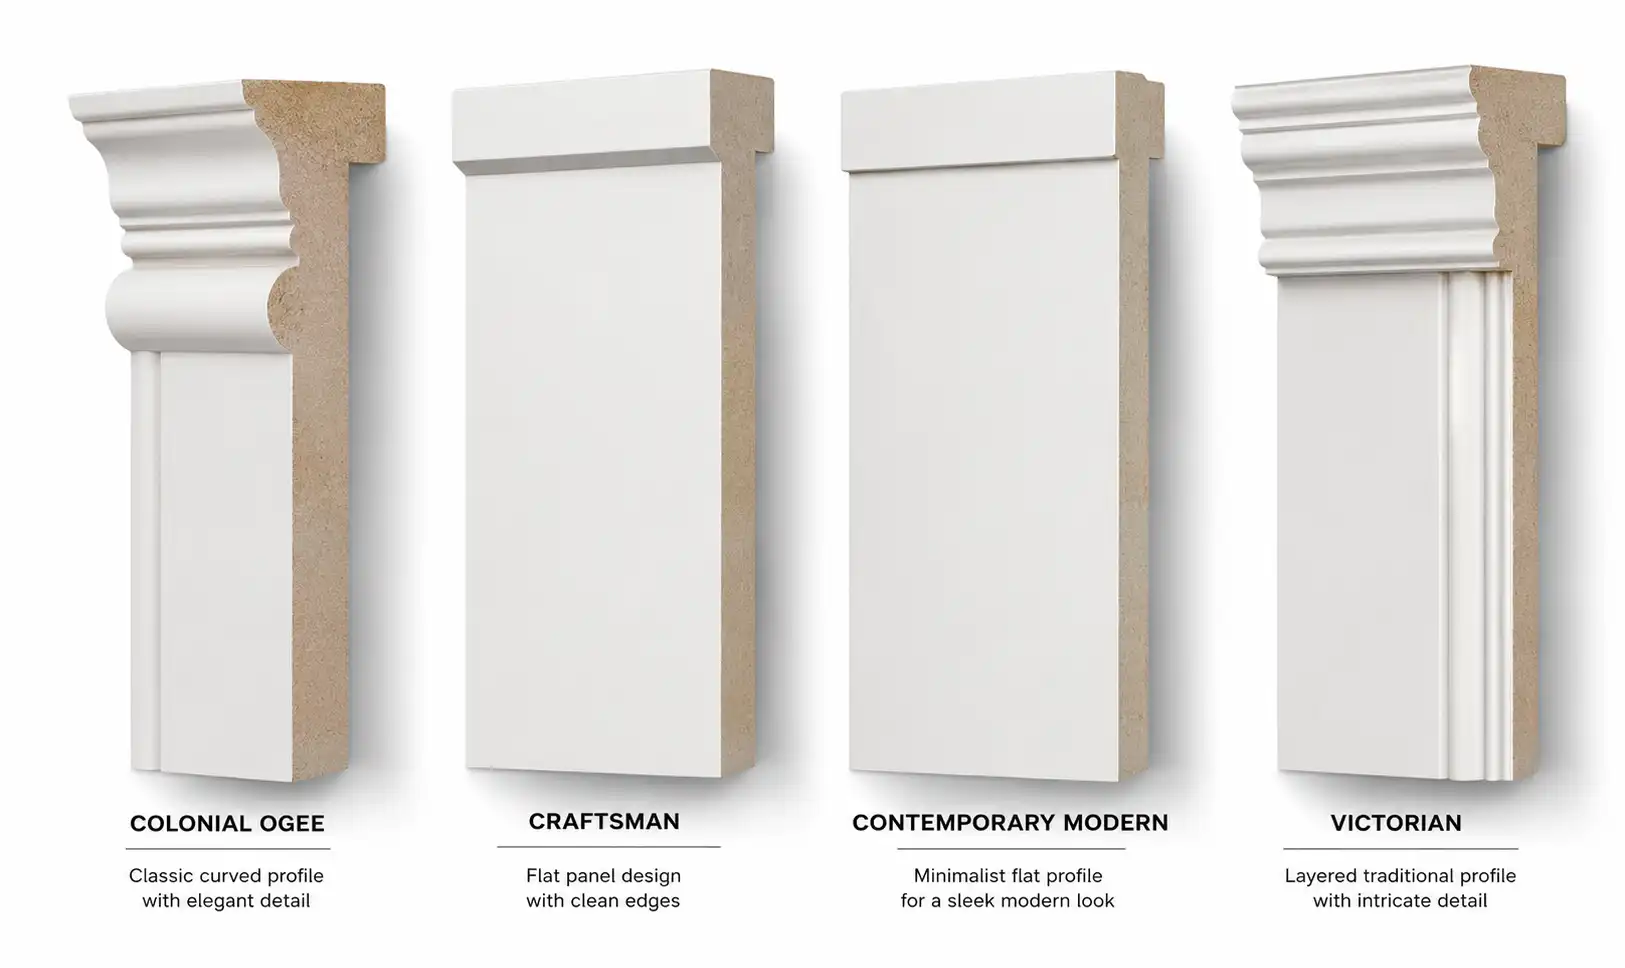
The most widely installed casing style in the United States, particularly in homes built between 1940 and 1990. Colonial casing has a curved ogee profile that creates shadow lines and visual depth. The profile is thicker at the outer edge and tapers toward the inside edge that sits against the jamb. Available in widths from 2.25 inches to 3.5 inches in paint-grade pine, poplar, hardwood oak, and MDF.
Best for: Traditional homes, colonial revival architecture, homes with detailed baseboards and crown moulding. Colonial casing pairs naturally with raised panel doors.
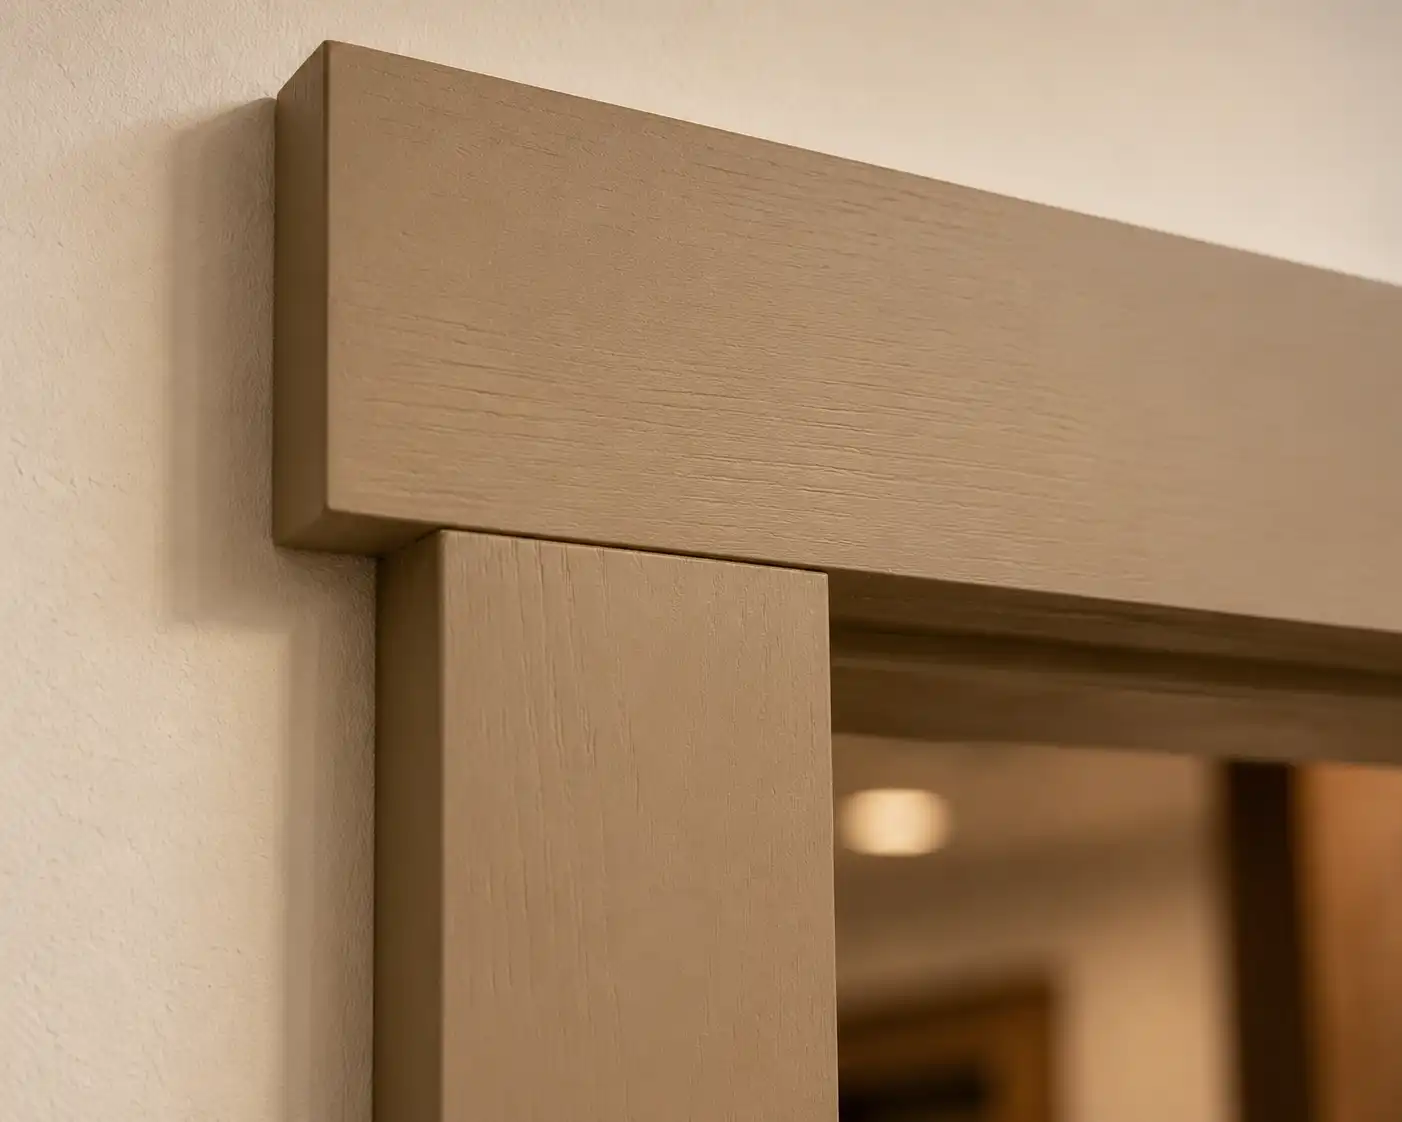
Craftsman casing uses flat or very slightly beveled boards rather than curved profiles. The defining characteristic is the flat, square-edged profile that creates clean lines without ornamentation. Craftsman casings are typically 3.5 to 5 inches wide and use a butted corner joint with a head casing that overhangs the side casings slightly.
Best for: Craftsman bungalows, arts and crafts homes, mid-century modern properties. Craftsman casing is the dominant original trim profile in most Los Angeles residential architecture built between 1910 and 1940.
If you have an older LA home and need to replace or match existing casing, bring a sample to our showroom and we will identify the profile and match it from stock or mill a custom run to match exactly.
Contemporary flat casing uses square-edged boards with no profile detail at all – completely flat with sharp 90-degree edges. The focus is on proportion and material rather than decorative profile. Flat casing is typically 2 to 3 inches wide and installed with either a mitered corner or a butted corner without a header reveal.
Best for: Modern, contemporary, and minimalist interiors. Homes with smooth white walls, black hardware, large-format tile, and wide-plank hardwood floors. Flat casing has become the fastest growing style choice in new construction and high-end renovation in Southern California since 2018.
Farmhouse door trim is a wider, chunkier version of flat or slightly beveled casing, typically 4 to 6 inches wide. The broad flat face creates a strong visual border around the door. Plinth blocks at the bottom corners where casing meets baseboard are common in farmhouse installations. Natural wood grain is often exposed rather than painted.
Best for: Modern farmhouse, rustic, and transitional style homes. Pairs naturally with shiplap accent walls, board and batten, and warm honey-toned hardwood floors.
Victorian casing uses complex profiles with multiple layers, flutes, reeds, and carved decorative elements. The profile is typically symmetrical – thick at both edges rather than tapering from thick to thin. Rosettes at the upper corners and plinth blocks at the base are essential components of a proper Victorian door casing installation.
Best for: Victorian-era homes, Queen Anne architecture, and any interior that leans into 19th-century decorative traditions.
Backband casing is an additional moulding applied to the outer edge of any standard casing to create a layered, built-up appearance. A flat or ogee-profiled backband is nailed around the perimeter of the main casing, adding depth and shadow lines without requiring ornate single-piece profiles. Can be added to existing painted casing as an upgrade without full replacement.
Best for: Homeowners who want more visual weight and detail than a standard colonial or flat casing provides. Effective budget upgrade option.
Pilaster casing incorporates a column-like element on each side of the door, creating a very wide and formal door surround. The pilasters may have fluted or plain shafts and are capped with a decorative entablature at the top. Pilaster casings significantly widen the visual footprint of the doorway and are most common in formal entryways and high-ceiling rooms.
Best for: Formal entryways, high-ceiling rooms, and historically significant homes where the door is meant to be a focal point.
Mitered vs butted corners: the joint decision
The way the three pieces of casing meet at the upper corners is as important as the profile choice. Two main joint types and two corner detail options cover every installation scenario.
45-degree angled cut
- Side and head casings meet at 45-degree cuts forming a clean 90-degree corner
- Looks seamless when cut precisely – the joint disappears visually
- Best match for Colonial, flat, and backband profiles
- Requires accurate miter saw – intermediate skill level
- Joint can open slightly if wood moves seasonally – apply wood glue to mitered joint before nailing
Square cut – head sits on top
- Side casings stop at a reveal line, head casing sits on top overlapping the sides
- The intentional overlap is part of the Craftsman and farmhouse aesthetic
- Beginner-friendly – no angle cuts required at the corner
- Head casing should extend 1/2 inch to 3/4 inch beyond each side casing
- Seasonal wood movement does not open this joint
Mitered Joint Stability: Always apply high-quality wood glue to the mitered faces before shooting finish nails. The mechanical strength of the glue holds the fibers secure when atmospheric humidity forces Southern California timber elements to shift.
Rosette corner blocks and plinth blocks
Rosettes and plinth blocks are decorative elements that solve the corner junction problem without any angle cutting. A rosette is a square decorative block at each upper corner – side casings and head casing simply butt into it with straight cuts. Typically 3.5 by 3.5 inches to 4 by 4 inches, the rosette must project slightly beyond the casing face.
A plinth block sits at the bottom of each casing leg where it meets the baseboard. The plinth block must be thicker than the baseboard and wider than the casing. The baseboard butts into the side of the plinth block, the casing leg butts into the top – no angle cutting is required at this junction. Plinth blocks are strongly recommended when the baseboard is 4 inches or taller.
Door casing sizes: the baseboard proportion rule
Standard door casing comes in widths from 2.25 inches to 3.5 inches for traditional profiles and up to 5 or 6 inches for Craftsman and farmhouse styles. The right width depends on door height, ceiling height, and the width of your baseboards.
The proportion rule most guides skip: Door casing should be equal to or slightly narrower than the baseboard height in the same room. A room with 5-inch baseboards looks proportionally correct with 3.5 to 4-inch casing. If the casing is significantly wider than the baseboard height, the doorway looks top-heavy and visually disconnected from the rest of the room’s trim.
| Door Height | Ceiling Height | Recommended Casing Width | Notes |
|---|---|---|---|
| 6 ft 8 in (standard) | 8 ft | 2.25 in to 3.5 in | Most common residential combination |
| 7 ft | 9 ft | 3 in to 4 in | Wider casing fills the larger visual area |
| 8 ft | 10 ft | 3.5 in to 5 in | Craftsman and farmhouse profiles suit tall openings |
| 8 ft plus (custom) | 10 ft plus | 4 in to 6 in | Large openings require wide casing to avoid looking underscaled |
The reveal rule: The reveal – the exposed edge of the jamb visible between the casing and the door opening – should be consistent at 3/16 inch to 1/4 inch around the entire perimeter. Mark this line with a pencil before installing any casing. Inconsistent reveal is the most visible installation error and cannot be hidden by paint or stain.
Door casing materials: the stain vs paint decision
Material choice determines whether you paint or stain, how the casing performs in humid rooms, and how long it lasts. This is where most buying decisions go wrong. The critical rule: if you intend to stain your door casing to match your hardwood flooring, you must use stain-grade hardwood. MDF will not accept stain evenly and paint-grade pine will blotch.
California note: All MDF products sold in California must meet CARB Phase 2 formaldehyde emission standards. Standard MDF manufactured outside California may not comply. Every product we stock at National Hardwood is California-compliant. Always verify CARB compliance before purchasing MDF door casing online from out-of-state suppliers.
Matching door casing to your hardwood floors
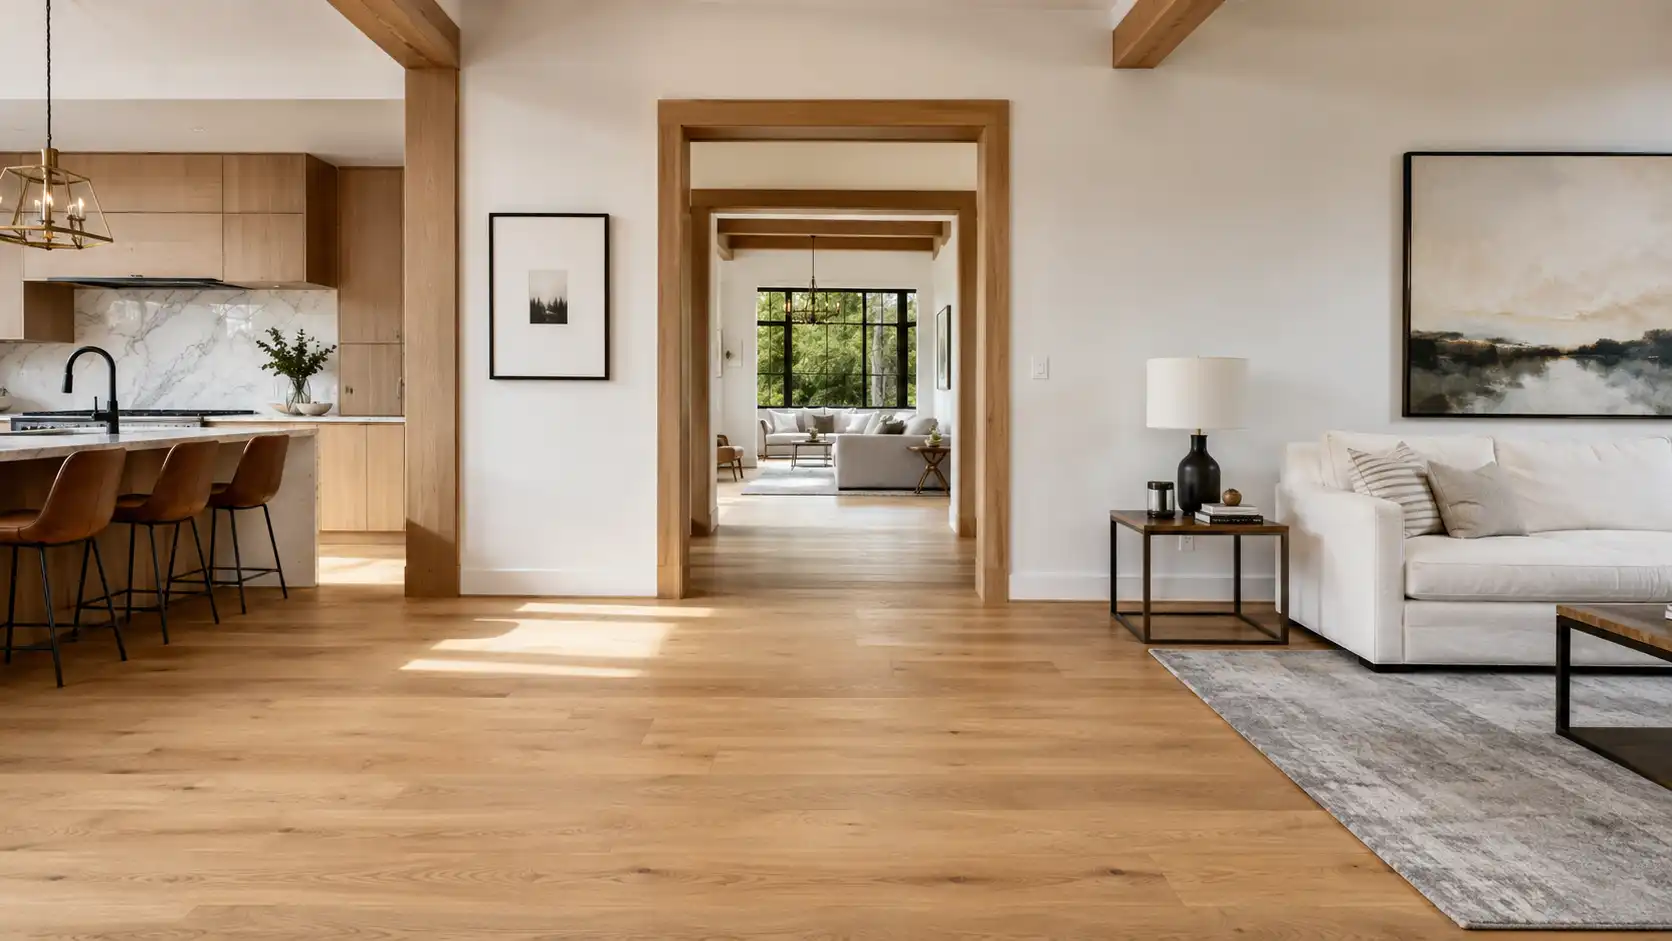
This is the most common question LA homeowners bring to our showroom – and the gap that no competitor’s guide covers properly. The most cohesive look is achieved by using the same wood species for casing as the hardwood floor.
| Floor Species | Best Matching Casing | Alternative Match | What to Avoid |
|---|---|---|---|
| White oak | White oak in matching stain or natural | Red oak in matching stain | Maple – grain pattern contrast is noticeable |
| Red oak | Red oak in matching stain | White oak in matching stain | Walnut – too dark unless contrast is intended |
| Walnut | Walnut in matching tone | Cherry in dark stain | Maple – grain too different, visual clash |
| Hickory | Hickory casing | Oak in warm honey tone | MDF painted – contrast between painted casing and stained floor looks unresolved |
| Engineered white oak | White oak solid casing or hemlock in matching stain | Hemlock in matching stain color | MDF – cannot be stained to match floor color |
| Natural or unstained white oak | Natural hemlock or white oak in clear coat | Maple in clear coat | Any painted casing – breaks the warm natural wood concept |
What to do when you cannot find a match
Older Los Angeles homes built before 1950 frequently have casing profiles that are no longer manufactured as standard products. If you cannot find a match in standard stock profiles, we can mill a custom run matching your existing profile from a sample piece. Bring a section of your existing casing to our Van Nuys showroom and our team will identify the profile or create a custom match.
Profile and style matching with existing trim
If your home already has moulding on baseboards, window casings, or crown moulding, your door casing profile should come from the same family. A room with flat craftsman baseboards looks unresolved if door casings are ornate colonial. See our full range of profiles at our hardwood moulding page.
Exterior door casing: different rules apply
Exterior door casing faces conditions that interior casing never encounters: UV exposure, rain, temperature swings, and potential moisture intrusion. The material requirements are fundamentally different. Never use standard MDF for exterior applications – it will swell and deteriorate within one to two seasons even when painted.
| Material | Exterior Suitable | Expected Lifespan | Maintenance |
|---|---|---|---|
| Cedar | Yes – naturally moisture resistant | 15 to 25 years | Stain or seal every 3 to 5 years |
| Mahogany | Yes – naturally moisture resistant | 20 to 30 years | Oil or seal every 3 to 5 years |
| Ipe | Yes – best performer | 40 plus years | Annual oil to maintain color, or leave to silver-gray patina |
| Clear or stain-grade pine | Yes if properly sealed | 10 to 15 years | Paint or seal every 2 to 4 years |
| PVC composite | Yes – best for low maintenance | 25 to 40 years | Minimal – clean and paint when desired |
| Standard MDF | No – will fail within 2 seasons | Under 2 years | Not applicable – unsuitable outdoors |
How to install door casing: step-by-step
Before installing new casing, if you need to remove existing trim first, read our guide on how to remove existing door trim without damaging drywall.
Tools required
- Miter saw (power miter saw for accuracy)
- Tape measure and pencil
- Combination square or speed square
- Finish nailer (15 or 16-gauge) plus 2-inch and 2.5-inch finish nails
- Wood glue for mitered joints
- Nail set
- Caulk gun and paintable latex caulk
- Sandpaper 120 and 180 grit
Do not caulk the reveal line – the small gap between casing and jamb at the reveal is intentional. It allows the door to operate without the casing binding against the jamb. Caulking it closed can cause the door to bind in humid weather.
Door casing cost: Southern California 2026
A standard single interior door requires approximately 20 linear feet of casing to trim one side. Order 25 linear feet to allow for waste from miter cuts. For a door trimmed on both sides, order 40 to 50 linear feet. Add 10 percent for waste on any order.
| Material | Cost Per Linear Ft | Cost Per Door (20 LFT) | Labor Per Door | Total Installed |
|---|---|---|---|---|
| Paint-grade pine or poplar | $1 to $3 | $20 to $60 | $75 to $150 | $95 to $210 |
| Stain-grade hemlock or oak | $3 to $6 | $60 to $120 | $100 to $175 | $160 to $295 |
| Hardwood oak or maple | $4 to $9 | $80 to $180 | $100 to $175 | $180 to $355 |
| Hardwood walnut or cherry | $8 to $15 | $160 to $300 | $125 to $200 | $285 to $500 |
| MDF pre-primed | $1 to $3 | $20 to $60 | $75 to $150 | $95 to $210 |
| Custom-milled hardwood | $10 to $25 plus | $200 to $500 plus | $150 to $250 | $350 to $750 plus |
Southern California labor rates are at the high end of national averages. Installing casing on all doors in a typical 3-bedroom home (10 to 12 doors) ranges from $1,500 to $4,500 for labor alone. Painting or staining is additional. Contractors and trade accounts receive volume pricing at National Hardwood.
