
Glue down LVP is more stable.
But removal is permanent.
Glue down vinyl plank is the most dimensionally stable LVP installation method – no movement, no hollow sound, no peaking at doorways. But it is also the hardest to remove and requires subfloor prep that most installers rush. This complete guide covers adhesive types, subfloor requirements, California slab specifics, glue down vs floating, and step-by-step installation.
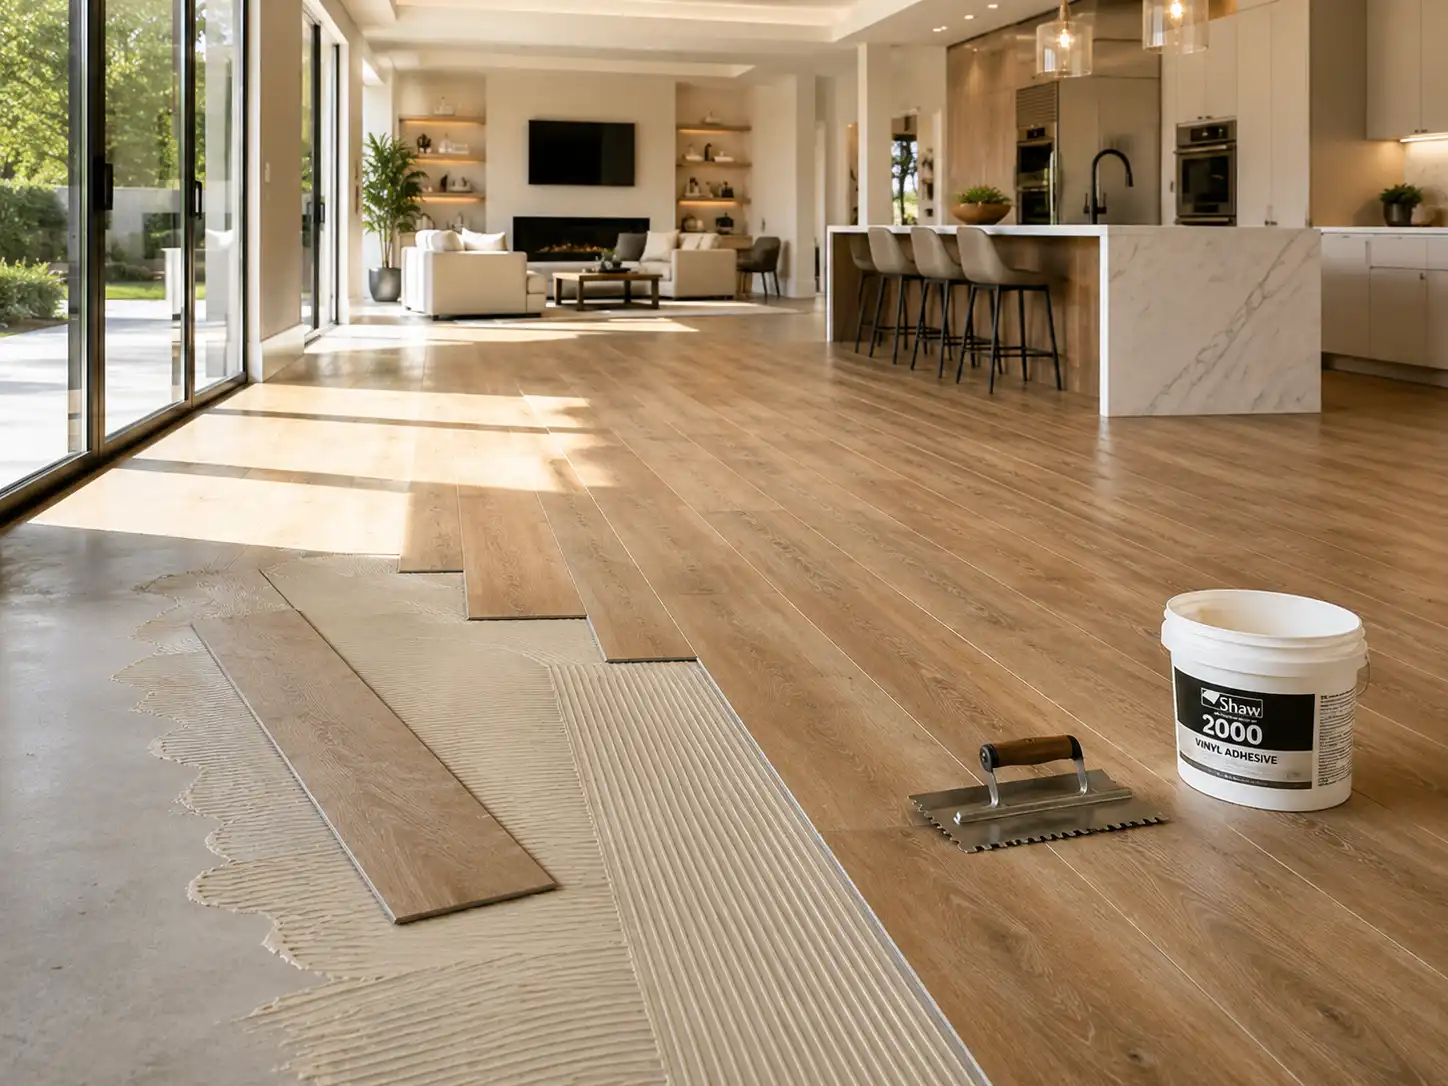
What is glue down vinyl plank flooring?
Glue down vinyl plank flooring – also called dryback LVP or full-spread vinyl – is a luxury vinyl plank installation method where each plank is permanently bonded to the subfloor using a vinyl adhesive rather than floating on the subfloor surface with a click-lock joint system. The adhesive creates a full bond between the back of each plank and the subfloor, eliminating all movement and producing the most dimensionally stable vinyl plank installation possible.
Unlike floating LVP, which clicks together at the joints and rests on the subfloor as a single connected sheet, glue down LVP treats each plank independently. The planks are thinner – typically 2mm to 3mm compared to 5mm to 8mm for floating LVP – because the subfloor provides all the structural support. The adhesive bond eliminates the need for the thick rigid core that floating LVP requires to span minor subfloor imperfections.
Glue down vs dryback: These terms mean the same thing. Dryback LVP is vinyl plank that has no adhesive on the back – the adhesive is applied to the subfloor separately. The term dryback distinguishes it from peel-and-stick vinyl which has factory-applied adhesive on the back. Both dryback and peel-and-stick are glue down methods – dryback simply uses a separately applied adhesive for a stronger, more controlled bond.
National Hardwood stocks both glue down LVP and floating click-lock LVP at our Van Nuys showroom. We carry both because different projects need different solutions. Our team can help you determine which installation method is right for your subfloor, your room, and your budget. Visit our Van Nuys showroom or call (818) 988-9663.
Glue down vs floating LVP: which should you choose?
This is the most important decision in a vinyl plank project. Both methods use the same vinyl plank material – the difference is entirely in how the planks are attached to the subfloor. The right choice depends on your subfloor condition, room size, traffic level, and future plans for the space.
Permanently bonded – most stable
- No movement at all – planks cannot shift, peak, or separate over time
- Quieter underfoot – no hollow sound from floating planks
- Thinner planks (2mm to 3mm) – better for transitions to other floor heights
- Best for high-traffic commercial and heavy residential use
- Can be installed in very large open areas without perimeter gaps
- More demanding subfloor flatness requirement
- Removal is very difficult and often damages the subfloor
- Higher installation skill level required – no repositioning once adhesive sets
- Takes 24 to 48 hours for adhesive to cure before heavy use
No adhesive – easier to install and remove
- Easier DIY installation – planks can be repositioned before the row is completed
- Can be removed and reinstalled in another location
- Thicker rigid core (5mm to 8mm) spans minor subfloor imperfections
- No waiting for adhesive to cure – walk on immediately after installation
- Hollow sound underfoot in some installations without good underlayment
- Can peak at seams in very large rooms or in high-heat Southern California summers
- Requires 1/4-inch expansion gap at all walls and vertical surfaces
- Best for residential use and rooms under 1,000 square feet
| Factor | Glue Down LVP | Floating Click-Lock LVP |
|---|---|---|
| Stability | Best – no movement possible | Good – can move slightly in temperature extremes |
| Sound underfoot | Solid – no hollow sound | Can sound hollow without good underlayment |
| DIY suitability | Difficult – no repositioning after adhesive sets | Good – planks can be repositioned before row completes |
| Removal | Very difficult – often damages subfloor | Easy – planks lift up without subfloor damage |
| Large open areas | No size limit – no expansion gap needed | Needs breaks every 30 to 40 feet in large rooms |
| Commercial suitability | Preferred – meets commercial specs | Some commercial applications only |
| Subfloor tolerance | Stricter – 3/16 inch in 10 feet | More forgiving – rigid core spans minor humps |
| Transition height | Lower profile – thinner plank | Higher profile – requires transitions at doorways |
| Cost | Higher – adhesive cost plus skilled labor | Lower – simpler installation labor |
When to always choose glue down: Commercial spaces and retail environments, rooms over 1,000 square feet without natural breaks, radiant heat floors (floating LVP can peak with heat cycles), very high foot traffic areas, and any installation where a completely solid underfoot feel is required. For Southern California homes with large open plan living areas and slab foundations, glue down is often the better long-term choice.
3 types of glue down LVP adhesive: which one for your project?
Adhesive selection is the most technically important decision in a glue down LVP installation. The wrong adhesive for the subfloor or product type causes bond failure, plank lifting, and floor replacement. There is no single right answer – the correct adhesive depends on the subfloor, the vinyl product, the room temperature range, and whether radiant heat is present.
Key advantage: The delayed repositioning window gives installers time to adjust planks before the final bond develops. However, the bond strength of PSA is lower than hard-set adhesives, making it less suitable for high-traffic commercial applications.
Key consideration: Hard-set adhesive is unforgiving. Once a plank is placed and pressed, it cannot be moved. It requires an experienced installer who can work quickly and accurately. It is the standard adhesive specified for commercial LVT and LVP installations in retail, hospitality, and healthcare environments.
Removal warning: Hard-set adhesive bond is extremely difficult to break. Floor removal typically requires scraping equipment, heat guns, or grinding – all of which damage the concrete slab surface. Factor this into the long-term cost of a hard-set glue down installation before choosing this method.
| MVER Level | Action Required |
|---|---|
| Under 3 lbs | Standard PSA adhesive acceptable for most products |
| 3 to 8 lbs | Moisture-resistant adhesive required – verify product compatibility |
| 8 to 17 lbs | Moisture mitigation system required before adhesive installation |
| Over 17 lbs | Moisture remediation required – consult structural specialist before proceeding |
Subfloor preparation: the step most installers rush
Glue down LVP is less forgiving of subfloor imperfections than floating LVP. The thin plank (2mm to 3mm) telegraphs every high spot, low spot, crack, and contaminant from the subfloor surface directly to the visible floor surface. Inadequate subfloor preparation is the leading cause of glue down LVP installation failure in Southern California.
The flatness standard that determines success or failure
The industry standard for glue down LVP subfloor flatness is 3/16 inch variation in any 10-foot span and 1/8 inch in any 6-foot span. This is stricter than the standard for floating LVP. Every high spot, low spot, or ridge that exceeds this tolerance will be visible through the installed floor and will create stress points that cause bond failure over time.
Existing adhesive residue on the slab: Old adhesive from previous vinyl or carpet installations cannot simply be covered. New adhesive does not bond well to old adhesive, and old adhesive often contains asbestos in homes built before 1980. Never sand or grind old adhesive residue without testing for asbestos first. Have the old adhesive tested before any mechanical removal.
Glue down LVP installation: step-by-step
Glue down LVP installation requires more preparation and skill than floating click-lock installation. The steps below assume a properly prepared concrete slab subfloor. For wood subfloor installation, verify the structural integrity and fastener spacing before proceeding.
Tools required
- Notched trowel (trowel size specified by adhesive manufacturer)
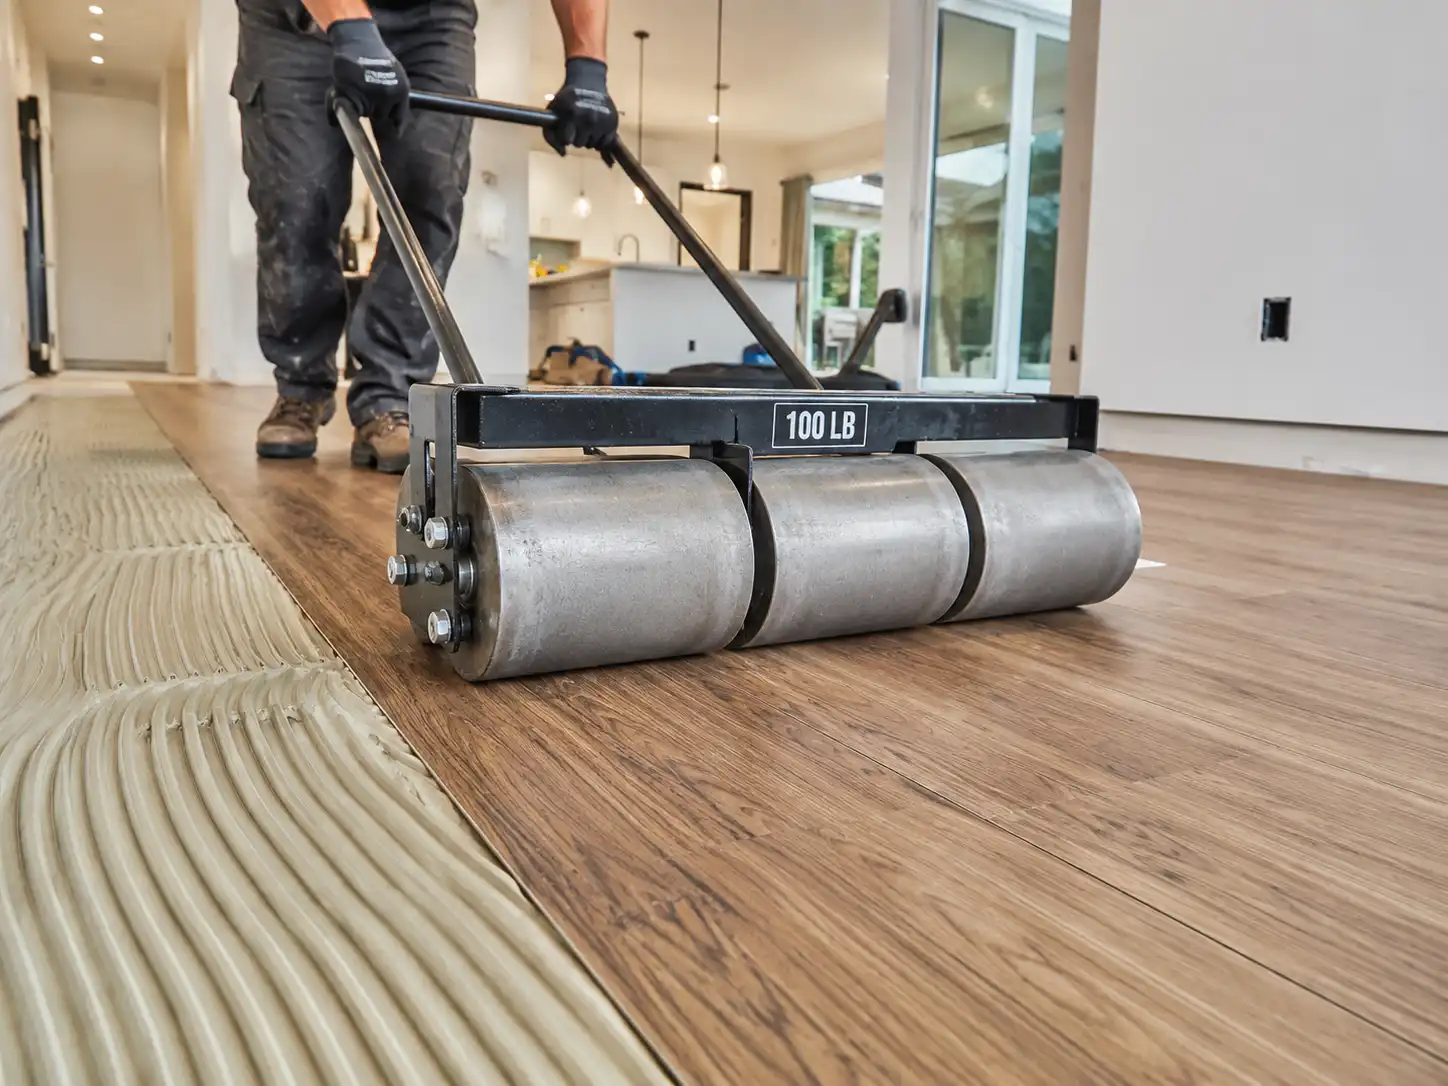
- 100 to 150-pound floor roller for pressing planks
- Chalk line for layout
- Utility knife with fresh blades for cutting planks
- Straightedge or T-square for cutting guide
- Tape measure and knee pads
- Slab surface thermometer and moisture meter
Glue down LVP problems: causes and how to avoid them
| Problem | Cause | How to Avoid |
|---|---|---|
| Planks lifting or releasing | Moisture from slab reaching adhesive layer. Also caused by wrong adhesive or contaminated subfloor. | MVER test before installation. Use moisture-resistant adhesive if MVER exceeds 3 lbs. Clean subfloor completely. |
| Ridges visible through floor | Subfloor not flat enough. Adhesive trowel ridges not collapsed by rolling. | Grind all high spots to the flatness standard. Roll every section with 100-pound roller thoroughly. |
| Adhesive squeeze-out at joints | Too much adhesive applied, adhesive not flashed long enough, or too much pressure. | Use the correct trowel size specified. Allow full flash time. Do not press planks excessively during setting. |
| Planks moving or shifting | Planks installed before adhesive was ready, or spread over too large an area and dried. | Work in smaller sections. Verify adhesive tack before setting. Use the adhesive specified by the manufacturer. |
Glue down LVP cost guide: Southern California 2026
| Component | Cost | Notes |
|---|---|---|
| Glue down LVP material — residential | $2.00 to $4.00 per sq ft | 2mm to 3mm thickness, residential wear layer. CARB compliant. |
| Glue down LVP material — commercial | $3.00 to $6.00 per sq ft | Thicker wear layer, heavier use rating. Hospital and retail grade. |
| Pressure-sensitive adhesive | $0.20 to $0.40 per sq ft | Standard residential PSA. Coverage approx. 40 to 60 sq ft per gallon. |
| Moisture-resistant adhesive | $0.40 to $0.80 per sq ft | Required if MVER exceeds 3 lbs. Epoxy or polyurethane chemistry. |
| Subfloor prep — grinding and leveling | $0.50 to $2.00 per sq ft | Varies widely by condition. Very flat slabs need minimal prep. |
| Installation labor — residential | $2.00 to $3.50 per sq ft | Southern California rates. Glue down is labor-intensive. |
| Total installed — mid-range residential | $5.00 to $9.00 per sq ft | Typical all-in cost for a SoCal glue down installation with proper prep. |
Trade and contractor accounts receive material pricing discounts on glue down LVP and adhesives at National Hardwood.
